-
- PCB TYPE
- PRINTED CIRCUIT BOARD PROTOTYPE ALUMINUM PRINTED CIRCUIT BOARD R&F PCB FPC HIGH FREQUENCY PCB HIGH-TG PCB HEAVY COPPER PCB HDI PCB PCB FOR LIGHTING METAL CORE PCB
time:Oct 24. 2025, 18:07:45
In the realm of electronics manufacturing, precision is crucial, especially when it comes to assembling printed circuit boards (PCBs). One often-overlooked aspect of PCB assembly is the use of countersink holes. This guide will explore the importance of countersink drilling in PCB assembly, how to execute it effectively, and why it might be the right choice for your next project.
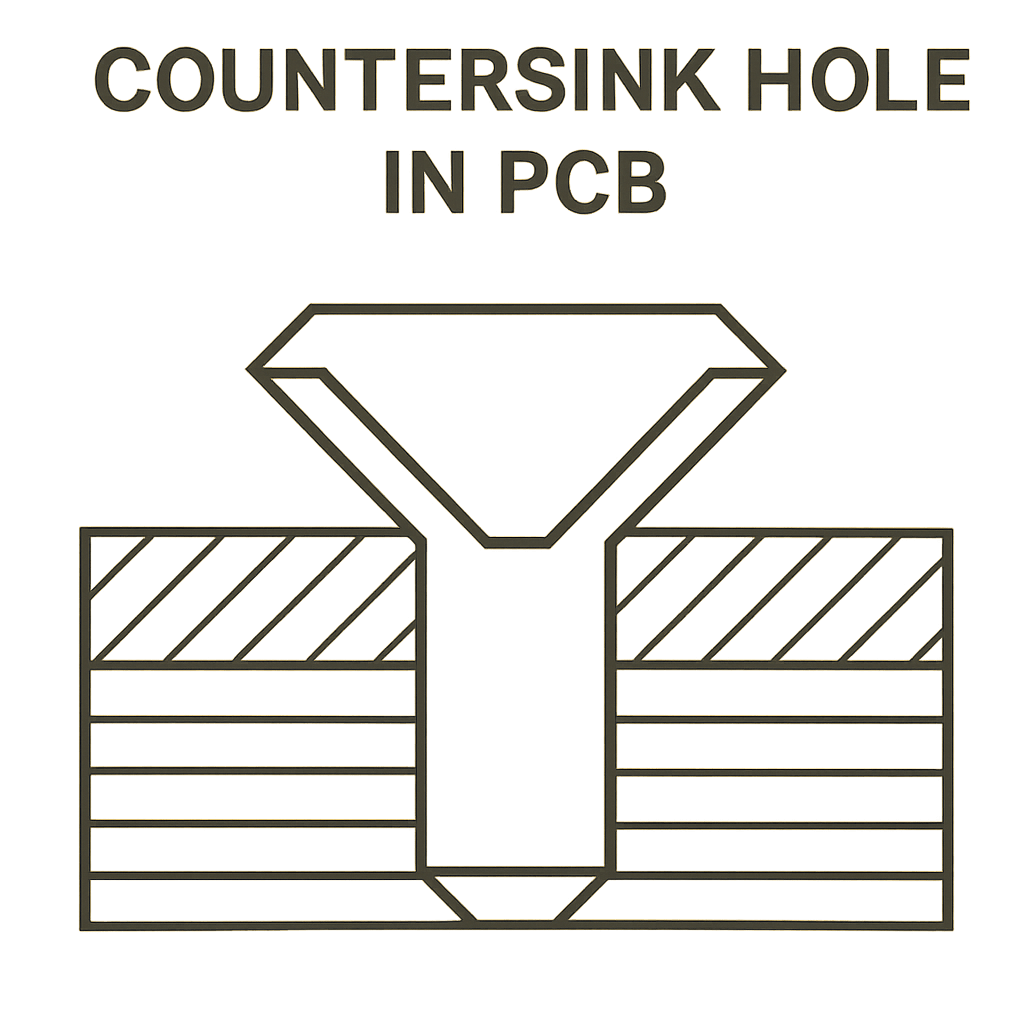
Before diving into the assembly process, it’s essential to understand what countersink holes are. A countersink hole is a conical hole cut into a PCB to allow a flat-head screw to sit flush with or below the surface of the board. This type of hole is typically used to improve the aesthetics of the board and to prevent screws from interfering with other components.
Countersink holes in PCB assembly offer several advantages:
Aesthetic Appeal: By allowing screws to sit flush with the board, countersink holes create a cleaner and more professional appearance.
Component Clearance: They prevent screws from protruding, which can interfere with other components on the board.
Structural Integrity: Countersink holes can contribute to a more secure fastening of components, reducing the likelihood of mechanical failure.

Executing countersink drilling correctly requires careful planning and precision. Here’s a step-by-step guide:
Before beginning the drilling process, incorporate countersink holes into your PCB design. Use PCB design software to specify the locati0n, size, and angle of each countersink hole. This step is crucial to ensure that the holes align with the components they are intended to secure.
For effective countersink drilling, you'll need the appropriate tools. These typically include:
Countersink Drill Bit: Choose a drill bit that matches the size and angle required for your specific screws.
Drill Press or CNC Machine: Precision is key, so using a drill press or CNC machine will provide the accuracy needed for clean countersink holes.
When setting up your drilling equipment, ensure it is calibrated correctly. Misalignment can lead to improper hole dimensions and compromised board integrity.
Secure the PCB: Use clamps or a vice to hold the PCB steady during drilling.
Adjust Drill Speed: Set the drill speed according to the material of the PCB. Faster speeds may be necessary for harder materials.
With everything in place, you can begin the drilling process:
Align the Drill Bit: Position the drill bit directly above the marked locati0n for the countersink hole.
Drill the Pilot Hole: Start with a pilot hole to guide the countersink drill bit.
Create the Countersink: Slowly lower the countersink drill bit into the pilot hole, drilling to the desired depth.
After drilling, inspect each countersink hole for accuracy. Ensure that the screws fit flush with the board surface and that there are no burrs or rough edges that could interfere with assembly.

Once the countersink holes are drilled, the next phase is assembling the PCB. Here are some techniques to consider:
With countersink holes in place, it's crucial to verify that all components are correctly aligned. Double-check that none of the flat-head screws obstruct or interfere with component placement.
During the soldering process, ensure that heat does not warp or damage the countersink holes. Use a soldering iron with a temperature control feature to maintain a consistent heat level.
After assembly, conduct thorough testing to ensure that the PCB functions as intended. Quality assurance is vital to verify that the countersink holes have not compromised the board's structural integrity or functionality.

Countersink holes are not always necessary in PCB assembly, so understanding when to use them is important. Consider employing countersink holes in the following situations:
Aesthetic Projects: If the PCB will be visible in the final product, countersink holes can enhance the overall look.
Compact Designs: In designs where space is limited, countersink holes can help maximize available area by reducing screw protrusion.
High-Precision Applications: For projects requiring precise component alignment, countersink holes can provide the necessary stability.
Countersink holes are a valuable technique in PCB assembly, offering both functional and aesthetic benefits. By understanding how to design, drill, and assemble with countersink holes, you can enhance the quality and performance of your electronic projects. Whether you're working on a consumer gadget or industrial equipment, consider if countersink holes can elevate your PCB design to the next level.
[Contact ApolloPCB Today for a Complete Cost Analysis and Turnkey Quote]
Related News
PCB Assembly & Manufacturing Equipment Guide | ApolloPCB Solutions
PCB Assembly & Manufacturing Costs Guide | Turnkey PCB & FPCB Solutions
FPC High Density Component Assembly: Powering Compact, High-Performance Flexible Electronics

Got project ready to assembly? Contact us: info@apollopcb.com


We're not around but we still want to hear from you! Leave us a note:

Leave Message to APOLLOPCB
